

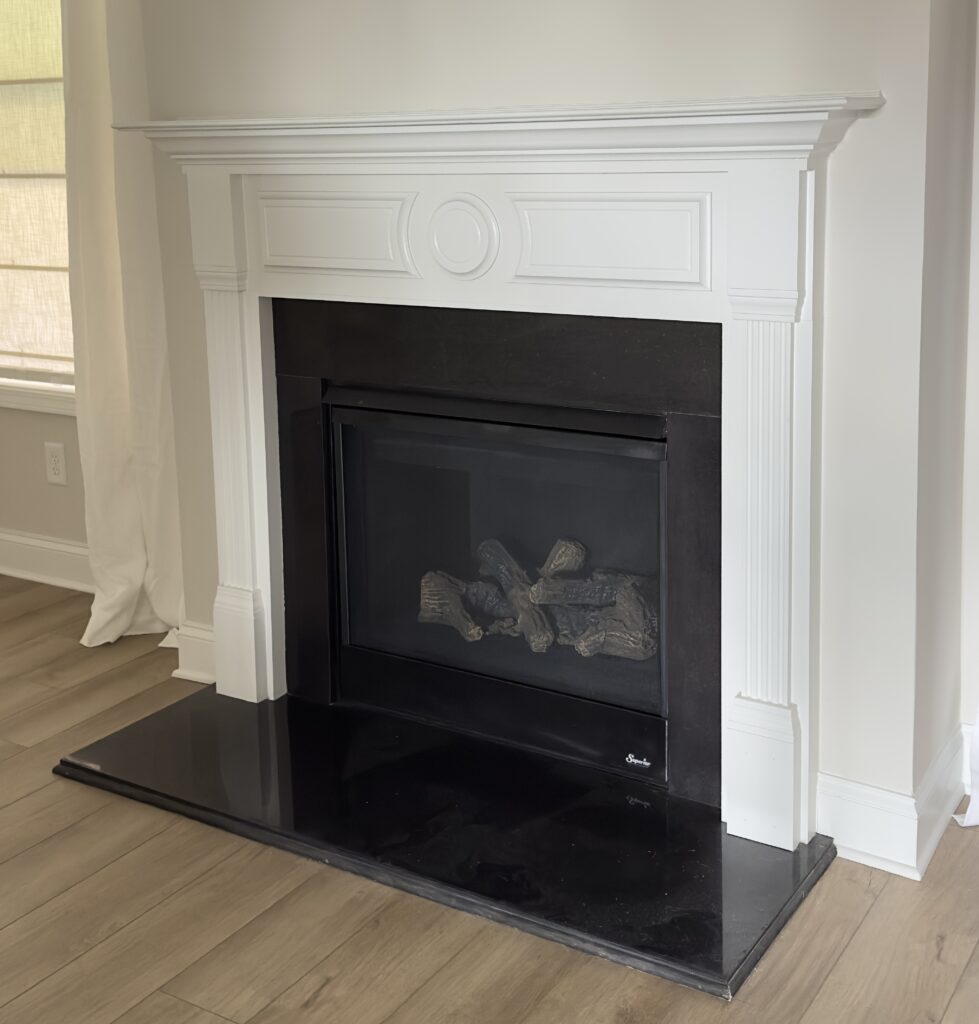
When we moved into our builder-grade home in Georgia, the living room came with the usual suspects: a plain white MDF mantel and a shiny black granite hearth. Functional, but not very inspiring.
In our last home, I had designed a stunning custom limestone fireplace that made the whole room feel elevated. I wanted that same wow factor here, but the quote from a local stone craftsman for something similar came in at $5–6k. His work was gorgeous—and totally worth it—but I just couldn’t bring myself to spend that much on a mantel this time around.
So I decided to try something totally different: build it myself.
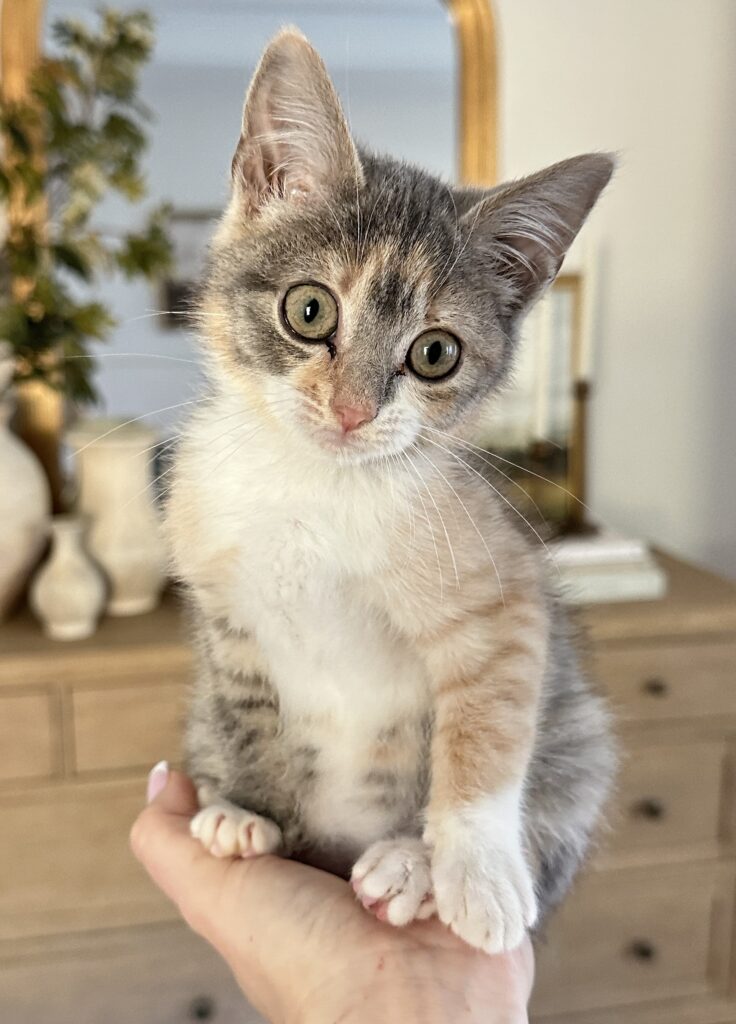
But first—plot twist—I found a six-week-old stray kitten under my car at the stone yard. She was dirty, tiny, and totally alone. I brought her home, gave her a bath, and by the next day, my daughter and the kitten were inseparable. She had been asking for a cat for years, and this little rescue became her shadow. We named her Biscuit (because she was making biscuits non-stop) and made her part of the family.
Okay, back to the fireplace….
My DIY Fireplace Plan
After seeing a few blog posts about people building fireplace surrounds out of wood and joint compound, I figured—why not? It was totally in my wheelhouse, and bonus: if it’s made of wood and plaster, I can paint it whenever I want. That kind of flexibility is a huge win for me because I change my mind a lot!
Step 1: Measure + Plan
I started by removing the old mantle so I could see how far the granite hearth extended. Then I measured the existing firebox, hearth, and wall. I would have loved to replace the black granite but decided it would be easiest to leave it in place and paint it to match the rest of the fireplace. You can see in the photo below, I primed that first before starting the build, but it was just to make sure that was possible before moving ahead. You can totally do that later in the process.
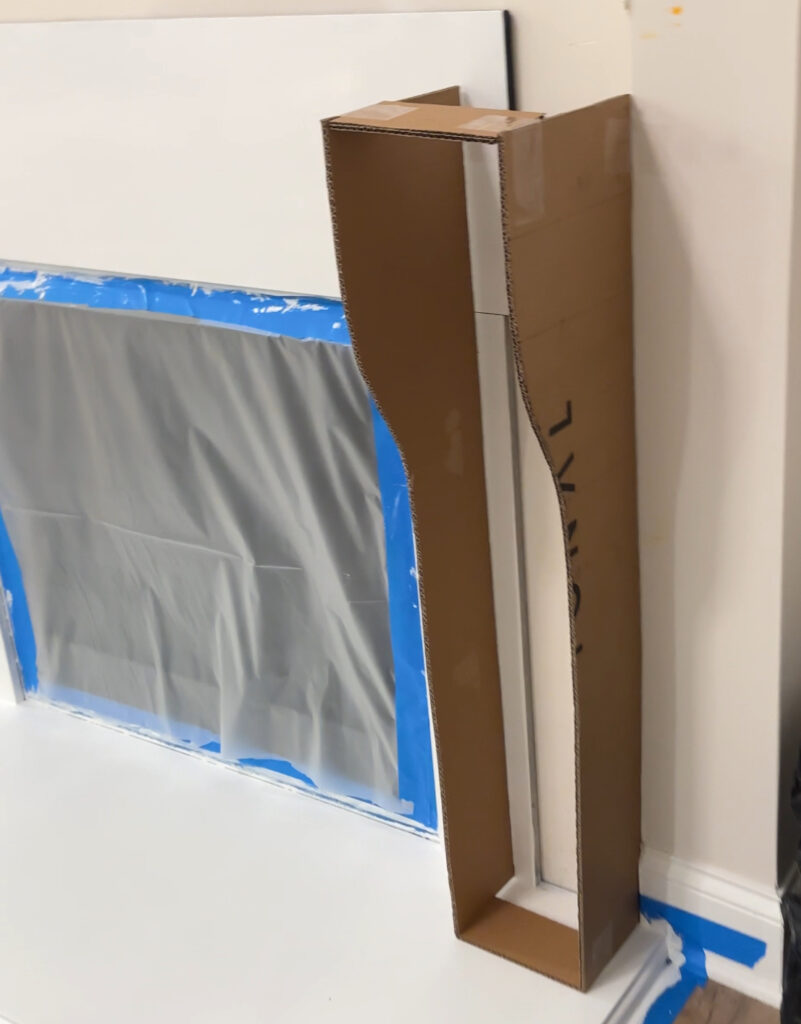
Then I sketched out the design. I wanted a shape inspired by old European fireplaces, with soft curves and a classic feel. Once I had the dimensions figured out, I made a scale drawing and a cardboard template for the curved legs. The cardboard helped me visualize the size and shape in real life, make any adjustments, then use the template for cutting with the jigsaw later.
Step 2: Materials
I bought:
- 1×10 boards for the legs and structure
- Super thin plywood (to bend around the curve)
- 1x12s for the top ledge
- 1×4 trim boards
- A bit of crown molding for detailing
- Sandpaper
- 1 5/8″ Screws & 2 1/2″ Screws (I use drywall screws for everything)
- Caulk (my fave is a high quality elastomeric)
- Joint compound
- Primer and paint (Used leftover from another project)
All in, it cost me about $200 in materials.
Tools I already had:
- DeWalt Jigsaw
- Caulk Gun
- My fave jigsaw blades
- Worktable
- Clamps
- DeWalt Miter Saw
- DeWalt Drill
- Putty knives
- Brush
Step 3: Build
Admitedly I did this slightly out of order because I did the demo and painted the granite before anything else, but it was to make sure I had a handle on what was possible with paint on stone. Turns out Kilz primer works great! So here are the steps I took minus the planning and granite painting stage.
- Demo: The original mantle came off super easily—it was barely attached.
- Curved legs: I traced my cardboard template onto four 1x10s and cut them with a jigsaw, then joined them with supports to form a sturdy U-shape.
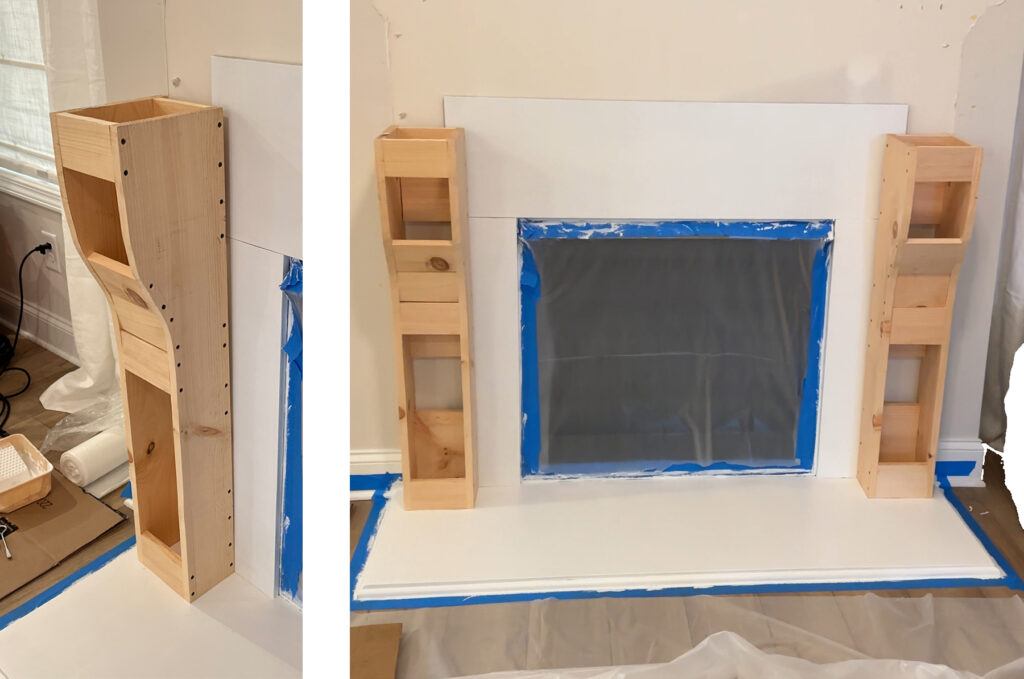
- Plywood wrap: I curved thin plywood over the front of the legs and screwed it in for a smooth, rounded look.
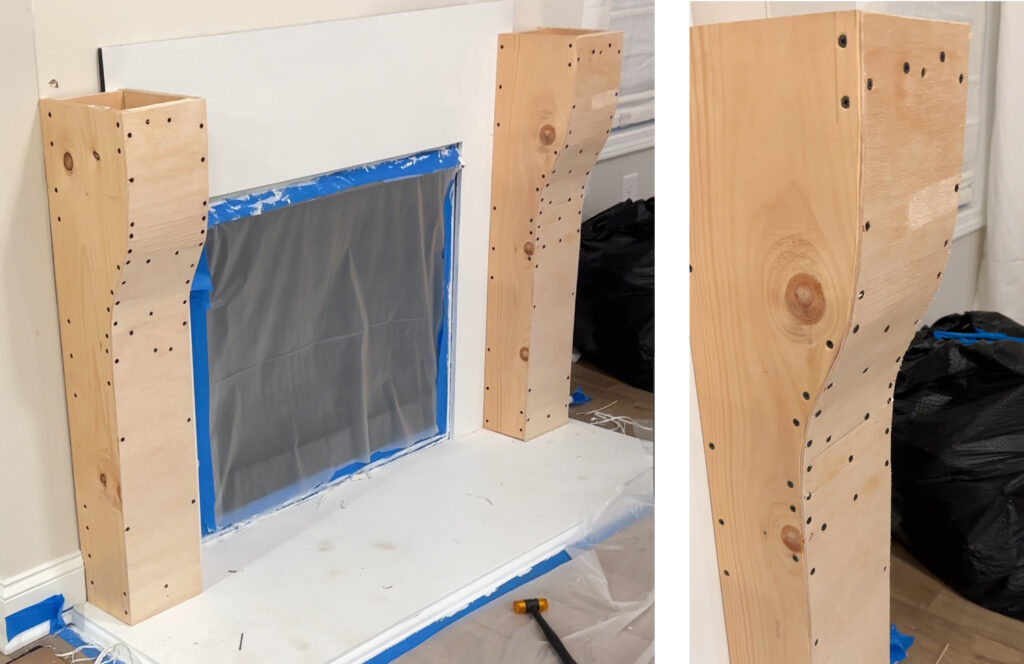
- Top box: I built a simple rectangular box to sit across the top of the legs, then stacked two 1x12s to give the mantle ledge a nice visual weight.
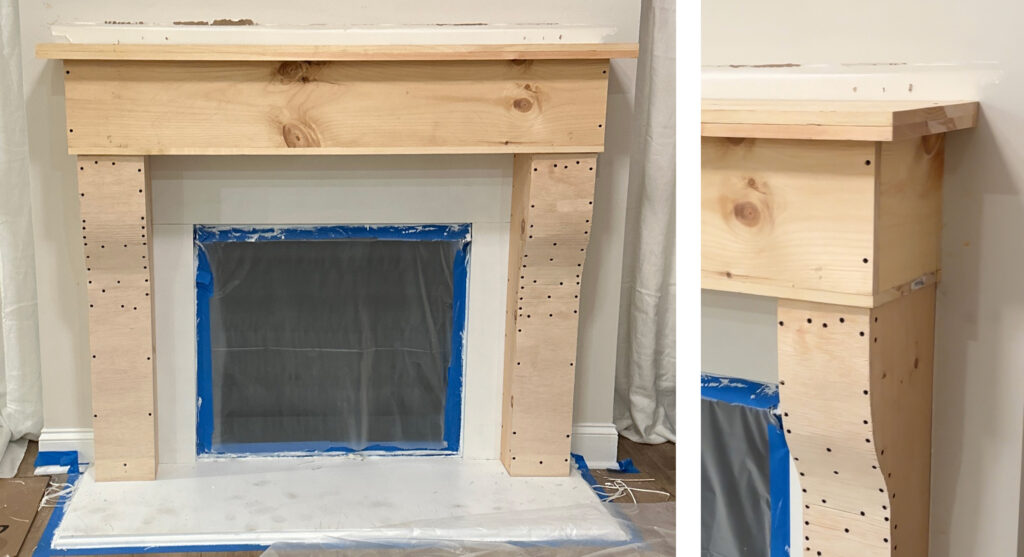
- Trim: I added 1×4 base trim and crown molding to tie everything together and give it a finished, architectural feel. I actually did this at the end, but if I had to do it again, it would be at this point in the process.
Step 4: Finish Work
Here’s where the magic really happens.
- Prime:
I primed the raw wood to make sure no moisture escapes into the joint compound in the next step.
- Joint Compound:
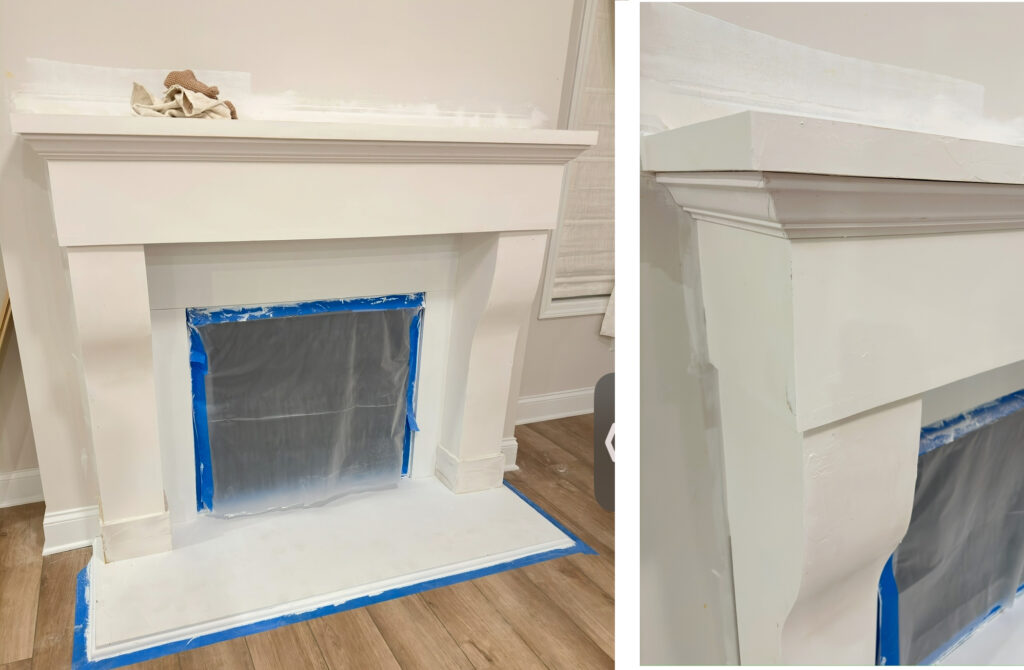
I coated the entire piece in a thin layer of joint compound using a wide putty knife and let it dry completely.
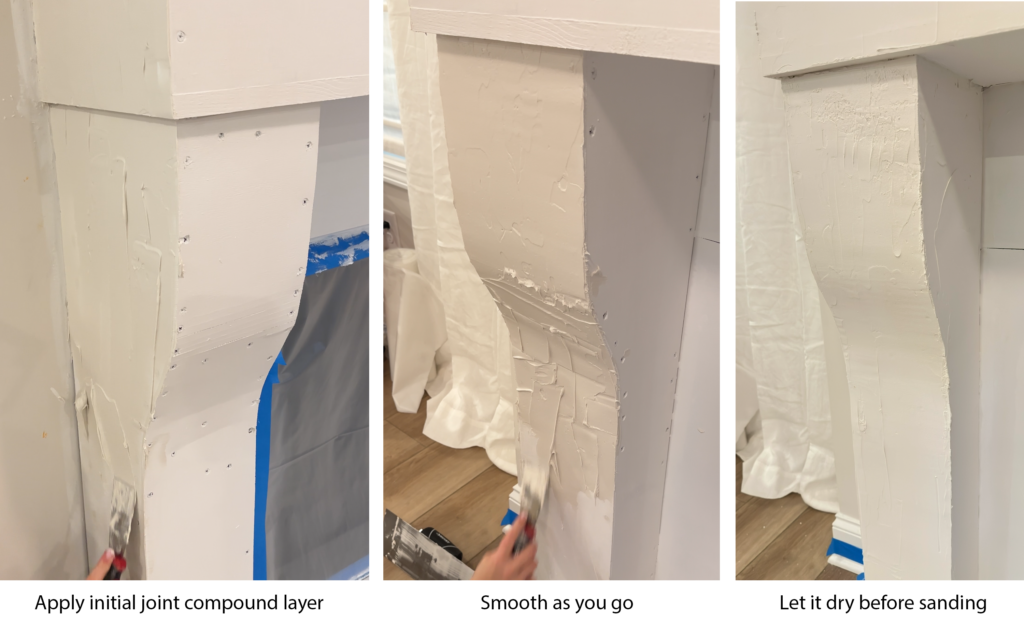
- Sanding & Shaping:
Then I sanded everything smooth, rounding out the curves, and making sure all the screw holes are well hidden. Any areas where the shape or smoothness was not what I wanted, I added an additional layer of joint compound, let it dry then sanded again.

- Hearth Sanding:
I also roughed up the granite hearth with 80-grit sandpaper so paint would adhere better (I actually did this step before starting the project, but if I did this again, that step would happen here).
- Caulking:
I caulked all the cracks and joints with an elastomeric caulk to create a clean solid look.
- Prime & Paint:
I applied another round of primer to seal the joint compound.- After priming, I first experimented with a roman plaster that I had found, but it did absolutely nothing for the finish and just ended up making my arms super tired. So unless you are going with a midtone to dark color, I recommend skipping that and have not included it here. The roman plaster aesthetic really only comes across with mid to darker colors.
- In the end, I painted it a white shade of paint I had on hand (I can’t remember which one).
- Change your mind!
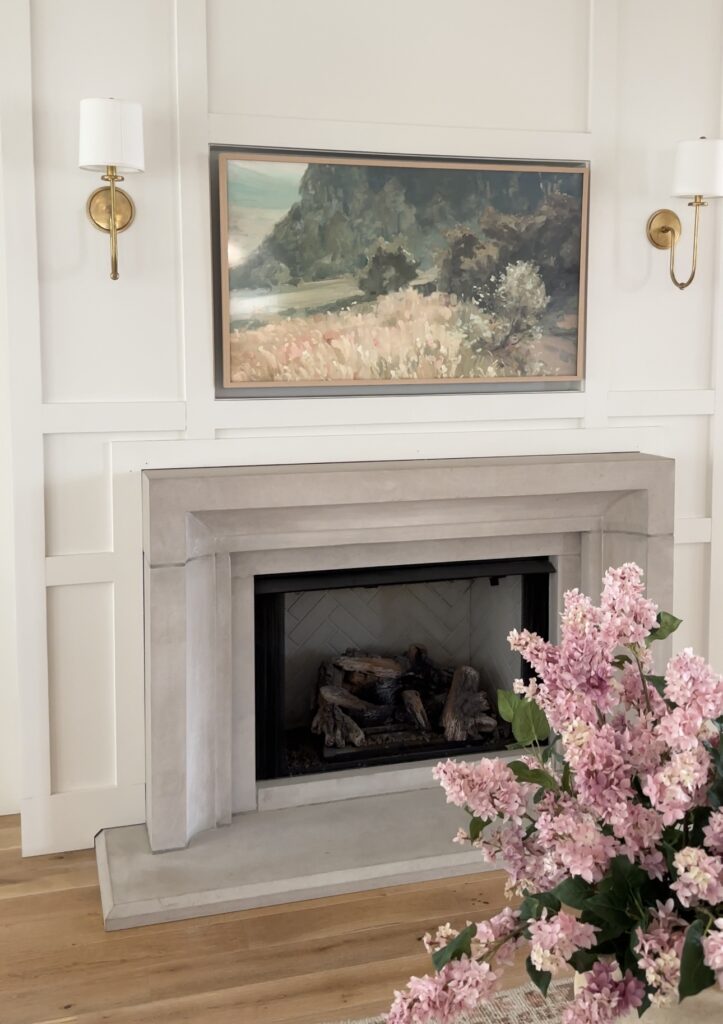
So, as expected, I changed my mind a couple months later and painted it Natural Cream by Benjamin Moore (Aura line). It’s a warm neutral that reads like a soft greige in my lighting—just perfect.
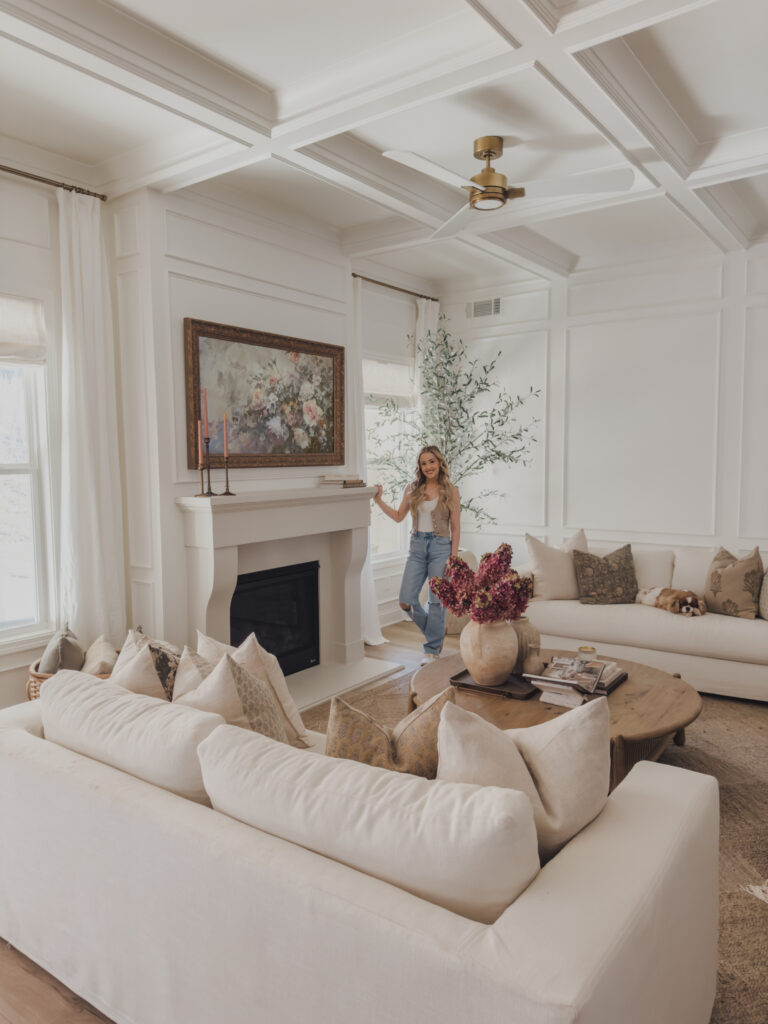
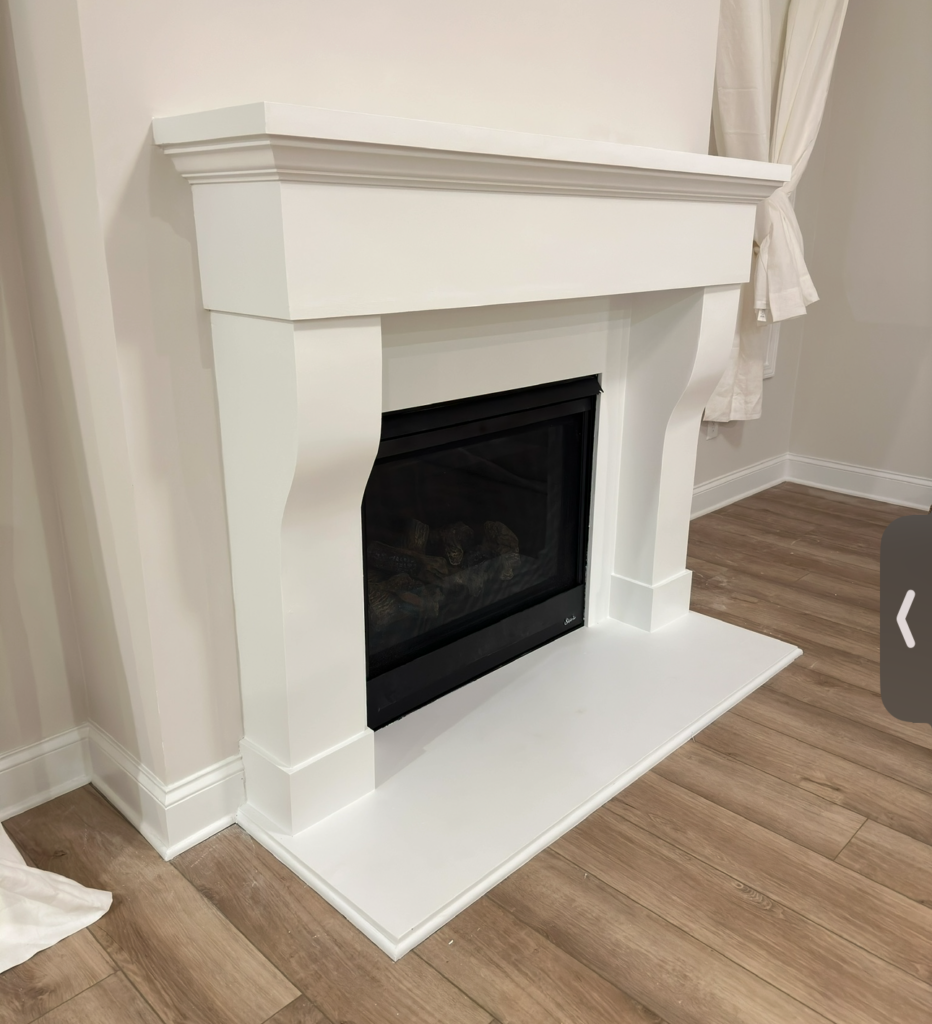
Final Result: Stone Look, Tiny Price Tag
This $200 DIY completely transformed the room. It looks like stone. It feels custom. And guests who’ve come by can’t tell it’s not real stone. Total win.
I got to design a piece I love, I didn’t spend a fortune, and the best part? I can change the color anytime I want.
Bonus: A Fireplace + A Cat Named Biscuit
That trip to the stone yard didn’t give me a limestone surround, but it gave me something even better—our new kitten. She showed up when we were ready for her, fit in like she’d always been here, and now she lounges by the fireplace like she owns the place.

Comments Off on How I Built a Custom Fireplace Surround for $200